
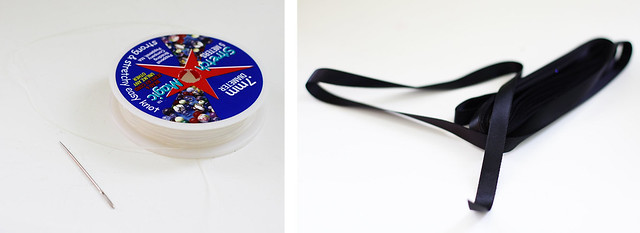

1st- gather your supplies. i wanted my bracelet to be stretchy, so the cord i sewed with was beading stretch magic. i used plain black ribbon i had on hand, and pearls (i had to put the pearls through the needle before hand to insure that they can fit through the widest part of the needle)
2nd- thread your needle with the stretch magic string.
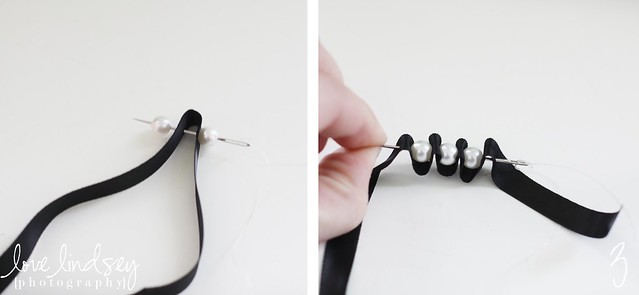
3rd- this is the main step (its just repeated the length of the bracelet)
string one pearl, then pinch together the ribbon and sew through the ribbon, then sew on another pearl.
notes: i tried to gather the same amount of ribbon each time to keep the bracelet looking consistent.
i found it easiest if i kept the most amount of pearls on my needle that i could.
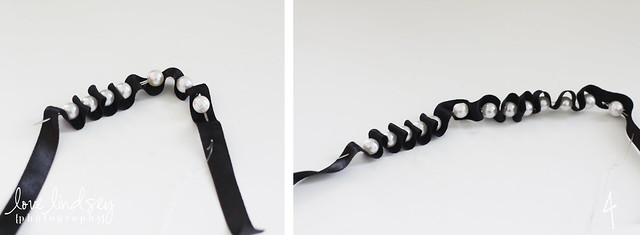
once the needle gets full, i just slid the pearl off. (it should look like picture 4.
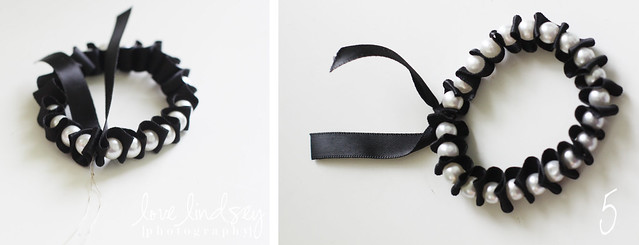
step 5- i tied the stretch (several times) i also recommend a dot of glue because my history with this string is that it comes untied fairly easy.
step 6- tie the ribbon (you could cut it off, leave some and knot it, or make a bow)
hint - try to decide what you want to do with the black ribbon at the beginning so you know how much to leave before you start sewing it.
happy beading!


No comments:
Post a Comment